Последнее время стало модным использовать продвинутую командную строку в PowerShell или bash/zsh. В этой статье я расскажу, что нужно сделать в PowerShell, WSL, Windows Terminal и VS Code, чтобы кастомизировать командную строку и воспользоваться всеми её преимуществами.

Краткий план действий:
- Установка шрифта Nerd
- Установка и настройка Oh My Posh для PowerShell
- Установка и настройка Oh My Posh для WSL
- Настройка Windows Terminal для правильного отображения глифов
- Настройка Windows VS Code для правильного отображения глифов
Из официальной документации я мало что понял. Пришлось разбираться самому. Поэтому сейчас я по порядку опишу путь, который пришлось пройти мне, чтобы заставить всё работать как надо.
Установка шрифта Nerd
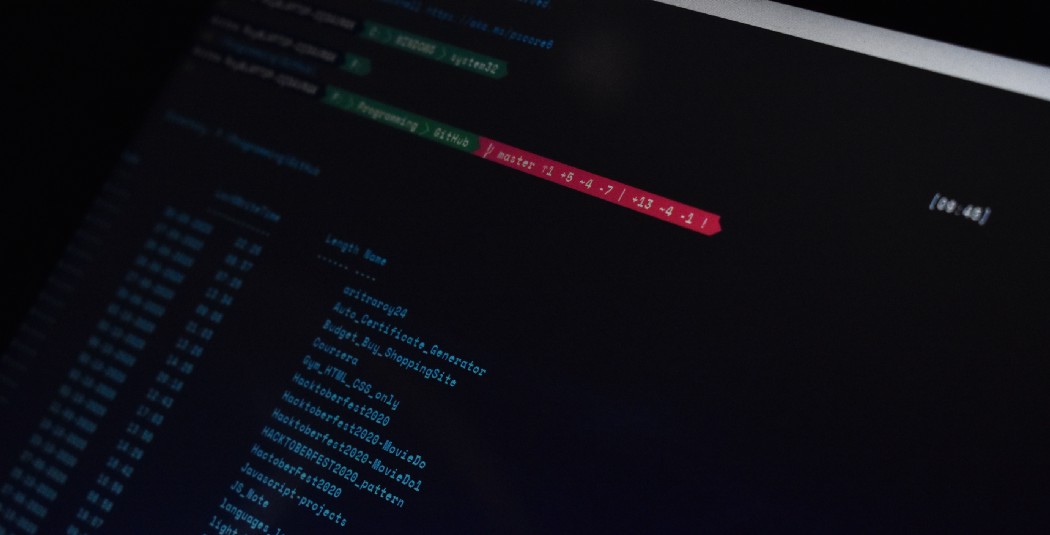
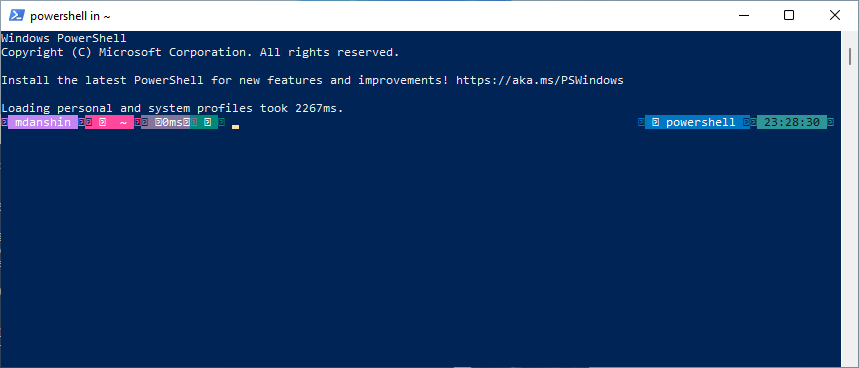
На картинке выше, показаны некоторые варианты оформления (тем) командной строки. На самом деле таких тем много, и вы можете их изменять и создавать свои. Как вы видите, почти все варианты содержат глифы (графические символы). Если шрифт, который используется в терминале, не содержит соответствующие глифы, в командной строке могут появиться символы замены, например квадрат - ▯ или знак вопроса �. Чтобы в терминале отображались все глифы, нужно сначала установить шрифт Nerd с сайта проекта https://www.nerdfonts.com/.
Nerd Fonts улучшает предназначенные для разработчиков шрифты с большим количеством глифов (значков). В частности, чтобы добавить большое количество дополнительных глифов из популярных «культовых шрифтов», таких как Font Awesome, Devicons, Octicons и других.
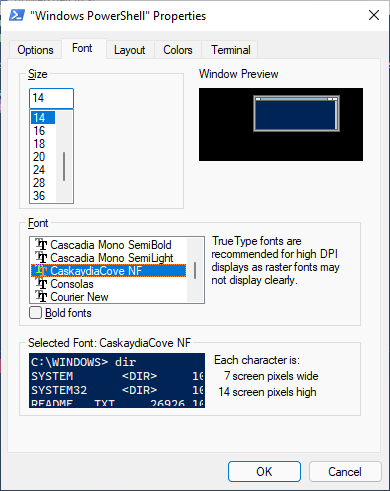
Посмотрев несколько шрифтов, я остановил свой выбор на Caskaydia Cove Nerd Font.
Все шрифты можно посмотреть по ссылке https://www.nerdfonts.com/font-downloads.
Скачав нужный шрифт, нужно его установить. Заходим в архив, выбираем нужный шрифт и открываем его.
А затем, в открывшемся окне, нажимаем кнопку Install
Шрифт установлен, можно переходить к следующему шагу - установке Oh My Posh.
Установка и настройка Oh My Posh для PowerShell
Как сказано в официальной документации, Oh My Posh — это настраиваемый механизм командной строки, для любой оболочки, которая имеет возможность настроить командную строку с помощью функции или переменной. Чтобы воспользоваться этим механизмом в PowerShell, нужно установить и импортировать соответствующий модуль.
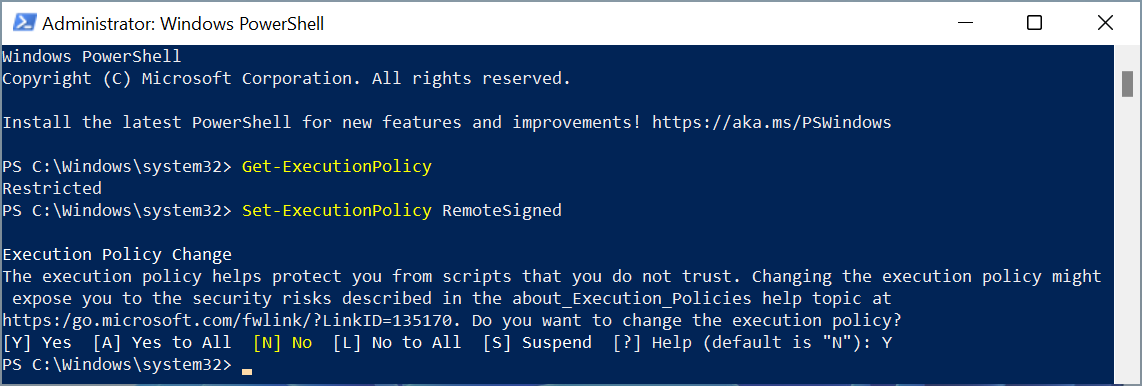
Но это может не получится, если параметр ExecutionPolicy в PowerShell установлен в Restricted или иное значение, которое не позволяет запускать удалённые скрипты. Что бы проверить текущие политики, выполните команду Get-ExecutionPolicy. Чтобы их изменить, запустите PowerShell от имени администратора и выполните команду и нажмите Y, а затем Enter для подтверждения.
Set-ExecutionPolicy RemoteSigned
Это позволит вам установить нужный модуль.
ВНИМАНИЕ: После изменения ExecutionPolicy закройте окно
PowerShell, которое вы открывали с повышенными привелегиями и откройте новое, с правами обычного пользователя.
Чтобы установить модуль Oh My Posh выполните следующую команду.
Install-Module oh-my-posh -Scope CurrentUser
Если пакетный менеджер NuGet ещё не установлен, то PowerShell запросит разрешение на его установку. Введите Y и нажмите Enter.
Далее вас предупредят, что вы собираетесь ставить модуль из недоверенного репозитория PSGallery. На самом деле всё нормально. Просто изначально все репозитории считаются недоверенными. Можете смоело продолжать установку введя Y и нажав Enter.
Обновите профиль PowerShell, отредактировав файл Microsoft.PowerShell_profile.ps1. Самым простым способом открытия этого файла, явялется выполнение следующей команды.
notepad $PROFILE
Если файла не существует, то система предложет вам его создать. Нажмите Yes в диалоговом окне.
Добавьте следующий фрагмент в конце файла. Вместо jandedobbeleer можете написать название другой темы. Я для себя выбрал именну эту.
Import-Module oh-my-posh
Set-PoshPrompt -Theme jandedobbeleer
Сохраните и закройте файл. Теперь каждый новый экземпляр PowerShell будет запущен с импортом Oh My Posh и установкой темы командной строки.
Запустите новый экземляр PowerShell. При первом запуске вы можете увидеть процесс импорта установленного ранее модуля Oh My Posh. Он выполниться один раз. Все последующие запуски PowerShell будут проходить как обычно.
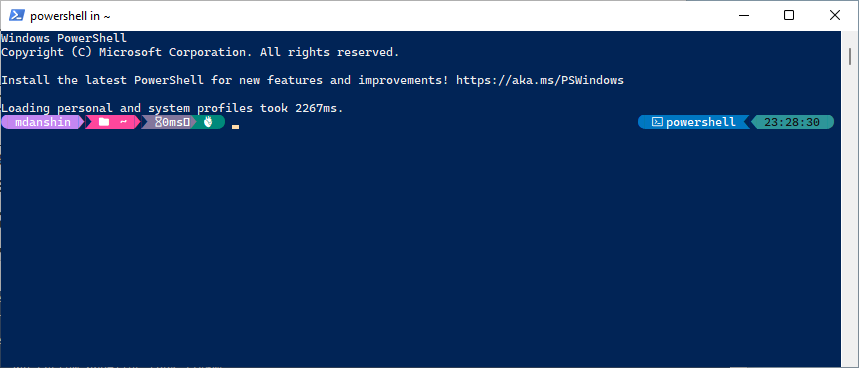
После запуска вы увидите обновлённую командную строку, как показано на картинке ниже. Обратите внимание, что не все символы отображаются корректно. Это связано с тем, что в терминале PowerShell сейчас используется шрифт, который не поддерживает глифы.
Зайдите в настройки терминала PowerShell и выберите шрифт с поддержкой глифов, который вы установили ранее. Или установите его сейчас, если вы пропустили этот шаг.

Как установить шрифт с поддержкой глифов, смотри в начале статьи.
Как только вы установите нужный шрифт, вы сразу же увидите правильное отображение командной строки.
Установка и настройка Oh My Posh для WSL
Если вы используете Windows 10 версии 2004 и выше (Build 19041 и выше) или Windows 11, и у вас ещё не установлен WSL, но вы хотите его установить, то запустите команду
wsl --installв терминале powershell с повышенными привилегиями, а после установки WSL перезапустите Windows. После перезапуска, установка продолжится. Более подробные сведения об установке и настройке WSL смотрите в моей статье “Установка и настройка WSL”(comming soon...)
Для установки Oh My Posh в Linux (WSL) нам потребуется пакетный менеджер Homebrew. Поэтому сначала запустите WSL и установите там Homebrew, выполнив следующую команду и следуйте инструкциям в окне терминала.
/bin/bash -c "$(curl -fsSL https://raw.githubusercontent.com/Homebrew/install/HEAD/install.sh)"
После того, как Homebrew будет установлен, нужно выполнить неколько команд, чтобы добавить Homebrew в PATH и в профиль командной оболочки bash.
test -d ~/.linuxbrew && eval "$(~/.linuxbrew/bin/brew shellenv)"
test -d /home/linuxbrew/.linuxbrew && eval "$(/home/linuxbrew/.linuxbrew/bin/brew shellenv)"
test -r ~/.bash_profile && echo "eval \"\$($(brew --prefix)/bin/brew shellenv)\"" >> ~/.bash_profile
echo "eval \"\$($(brew --prefix)/bin/brew shellenv)\"" >> ~/.profile
После установки и настройки Homebrew, можно приступать к установке Oh My Posh. Выполните следубщие команды.
brew tap jandedobbeleer/oh-my-posh
brew install oh-my-posh
Установите пакет unzip. Он понадобится для распаковки архива с темами. Этот шаг можно пропустить, если вы скачаете тему самостоятельно, извлекёте из архива файл с темой для Oh My Posh и положите его в домашнюю директорию пользователя. Иначе, выполните нижеследующие команды.
sudo apt install unzip
Теперь нужно скачать и распаковать темы.
mkdir -p $(brew --prefix)/oh-my-posh/themes
wget https://github.com/JanDeDobbeleer/oh-my-posh/releases/latest/download/themes.zip -O $(brew --prefix)/oh-my-posh/themes/themes.zip
unzip $(brew --prefix)/oh-my-posh/themes/themes.zip -d $(brew --prefix)/oh-my-posh/themes
chmod u+rw $(brew --prefix)/oh-my-posh/themes/*.json
rm $(brew --prefix)/oh-my-posh/themes/themes.zip
Скопируйте файл темы в домашнюю директорию.
cp $(brew --prefix)/oh-my-posh/themes/jandedobbeleer.omp.json ~/jandedobbeleer.omp.json
А затем запустите oh-my-posh.
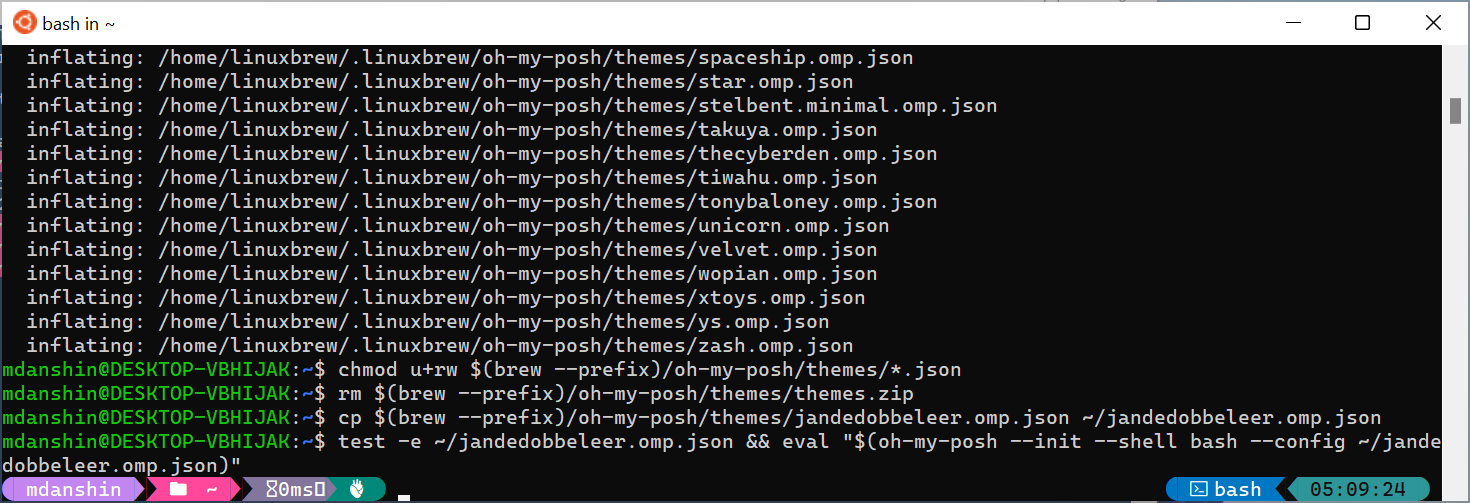
test -e ~/jandedobbeleer.omp.json && eval "$(oh-my-posh --init --shell bash --config ~/jandedobbeleer.omp.json)"
Вы увидите, что командная строка изменилась. Если она отображается не правильно, то измените шрифт в настройках вашего терминила, как говорилось ранее.
На этом установка и настройка Oh My Posh для WSL завершена.
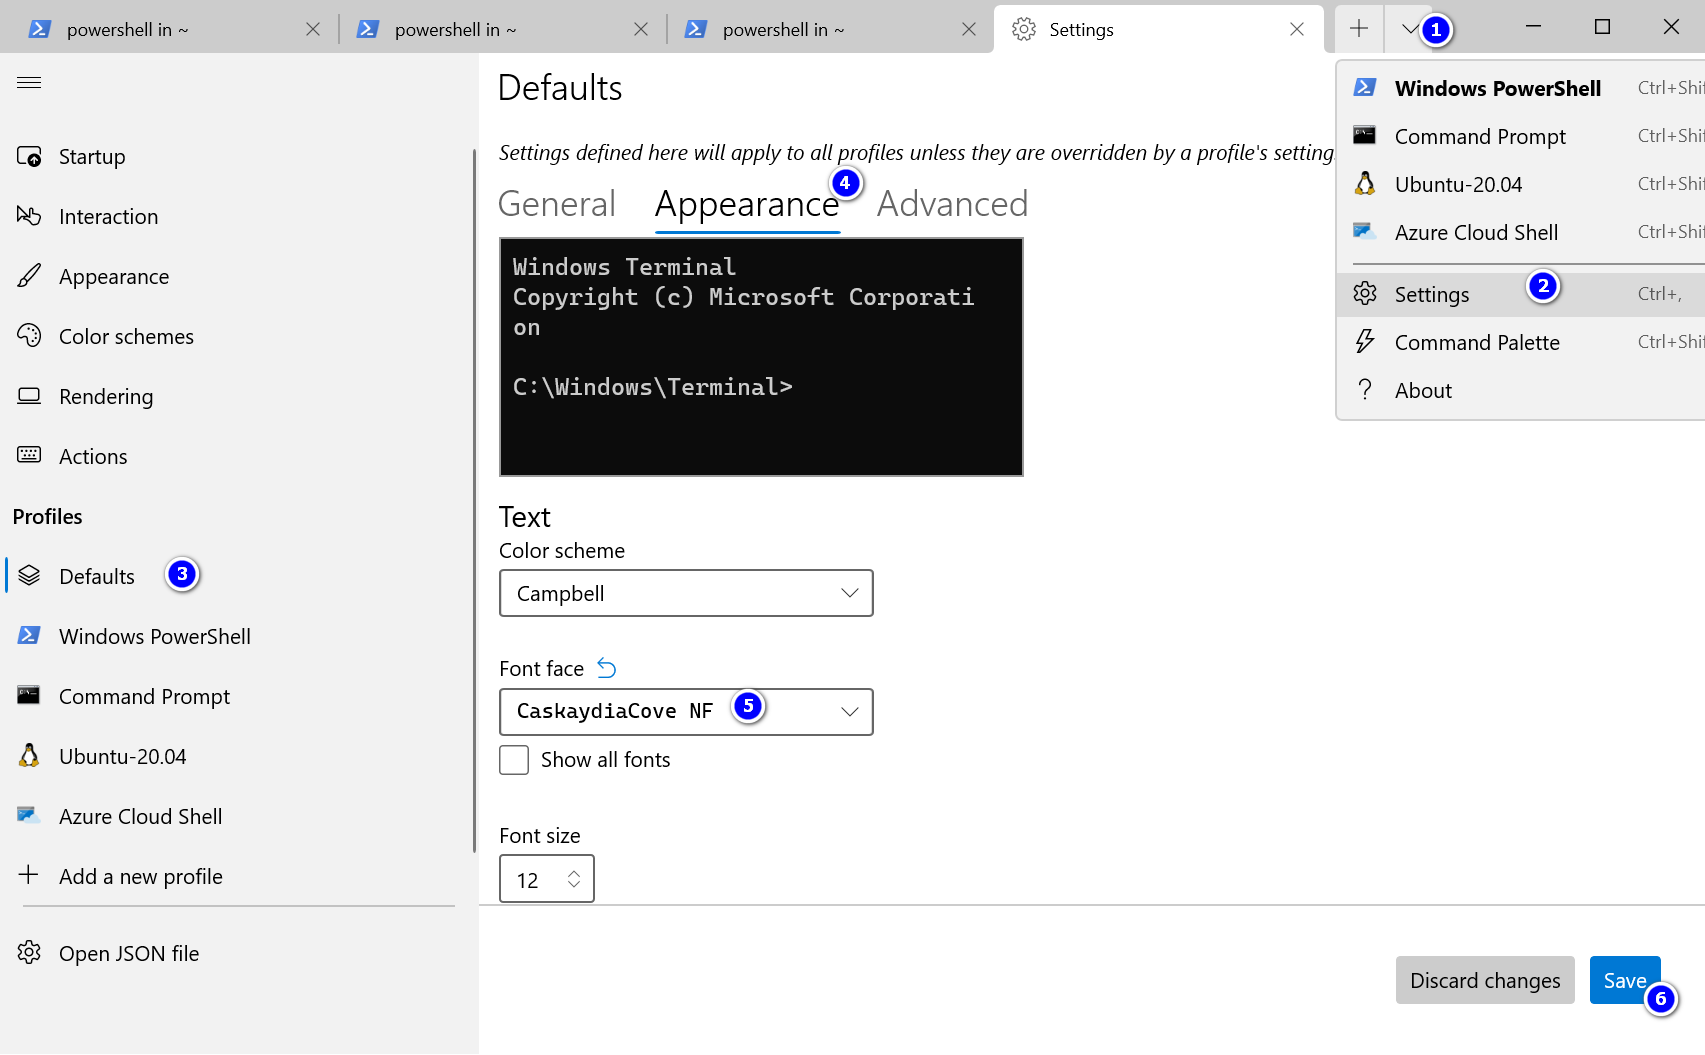
Настройка Windows Terminal для правильного отображения глифов
После запуска Windows Terminal вам нужно будет тольк сменить шрифт, иначе командная строка будет отображаться без глифов.

Чтобы это исправить, зайдите в настройки Windows Terminal, выберите профиль по умолчанию и на вкладке Appearance установите нужный шрифт. Затем нажмите Save и откройте новое окно терминала.
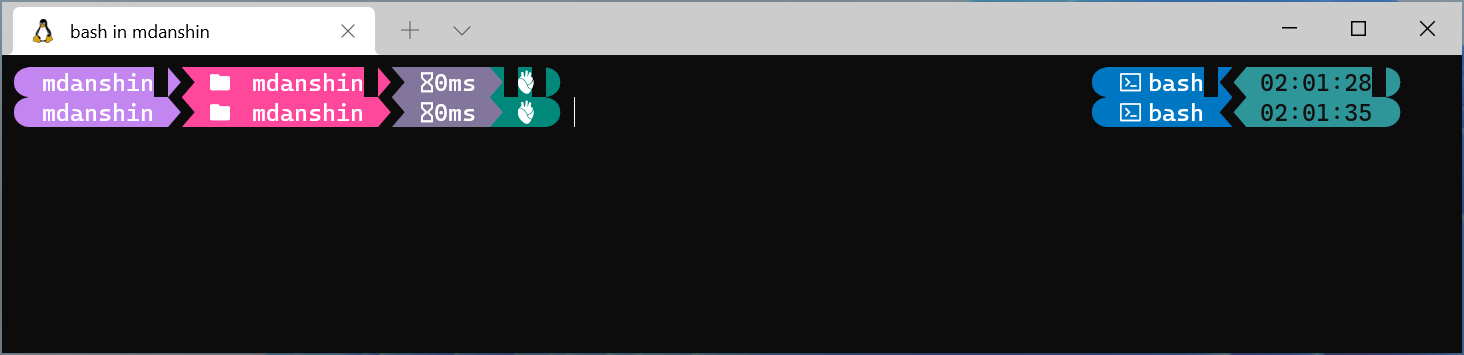
На этот раз командная строка будет отображать глифы, но есть одна проблема. При открытии WSL-терминала, первая командная строка отображается с дефектом. В ней присутствуют пропуски. Я не понял почему это происходит. Если нажать Enter, то следующая строка отобразиться нормально.
Я не придумал ничего лучше, чем добавить команду очистки экрана в файл .profile, чтобы она выполнялась каждый раз, при запуске сессии. Вы тоже можете это сделать, выполнив следующую команду.
echo "clear" >> ~/.profile
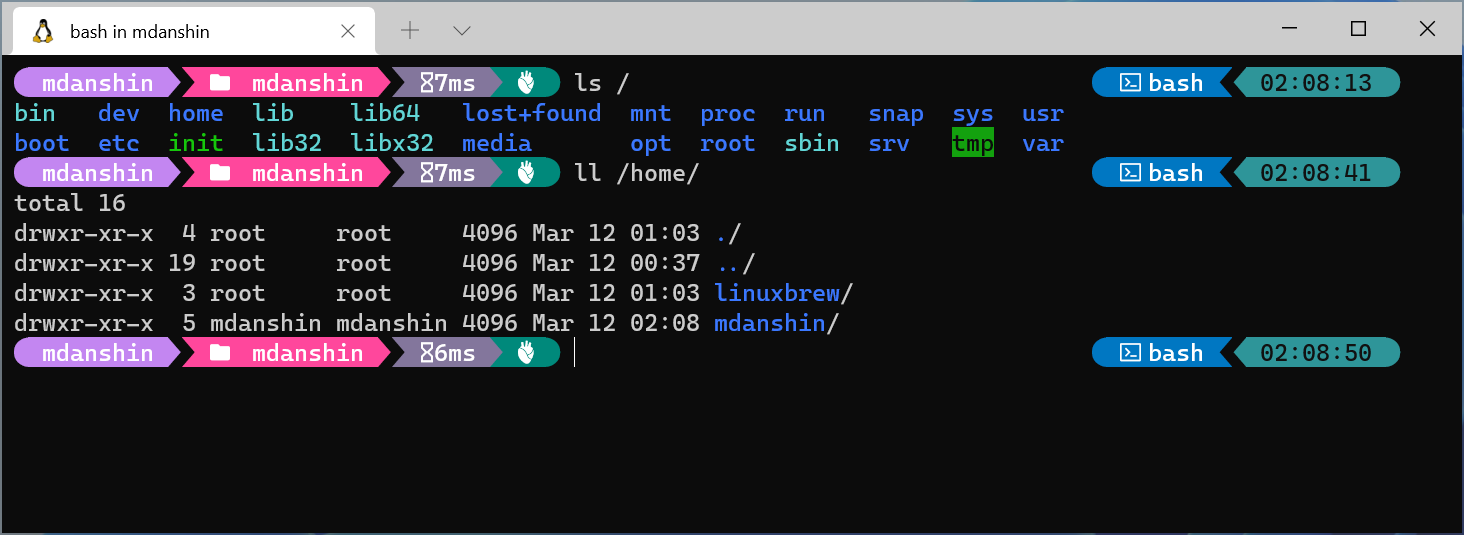
Теперь, если переоткрыть терминал, то всё будет выглядеть как надо.
И на этом часть по настройке Windows Terminal завершена. Посмотрите другю мою статью, где я описываю, как настроить более приятный вид Windows Terminal (comming soon...).
Настройка VS Code для правильного отображения глифов
Если вы откроете VS Code, и в нём откроете Terminal, то вы увидите, что глифы в нём тоже отображатся неправильно. Всё дело в настройках шрифтов.
Зайдите в настройки, выберите Terminal, пролистайте до настройки Integrated: Font Family и введите название своего шрифта. В моём случае это CaskaydiaCove NF. Полное название настройки terminal.integrated.fontFamily, можете вбить её в строку поиска настроек, для быстрого перехода к ней.
Если вы используете плагин Remote - WSL в VS Code, то возможно вам пригодится ещё один совет. Дело в том, что когда вы откроете новую сессию в WSL в VS Code, то заметите, что там ничего не поменялось. VS Code, при запуске bash в WSL, не читает данные из файла .profile, которые мы туда поместили.
Чтобы это исправить, можно ввести команду
bash -l
Параметр -l (согласно справочной странице) заставляет «bash действовать так, как если бы он был вызван как оболочка входа в систему». Оболочки входа читают определенные файлы инициализации из вашего домашнего каталога, такие как
.profile.
Но чтобы не делать это каждый раз вручную, давайте изменим конфигурацию VS Code.
К уже имеющимся настройкам, если они есть, добавьте следующие.

"terminal.integrated.defaultProfile.linux": "bash",
    "terminal.integrated.profiles.linux": {
        "bash": {
            "path": "bash",
            "args": [
                "-l"
            ]
        }
    }
Сохраните и перезапустите WSL-сессию. На этот раз у Вас всё должно отображаться правильно.
Вот и всё, чем я хотел поделиться в этой статье. Оставльяйте свои комментарии и отзывы. Всем мира и добра!
Lately it has become popular to use an advanced, customized prompt in PowerShell or bash/zsh. In this article I describe what to do in PowerShell, WSL, Windows Terminal and VS Code to customize your command line prompt and benefit from it.
Quick plan:
- Install a Nerd Font
- Install and configure Oh My Posh for PowerShell
- Install and configure Oh My Posh for WSL
- Configure Windows Terminal to display glyphs correctly
- Configure VS Code to display glyphs correctly
The official docs didn’t click for me, so I had to figure it out myself. Below is the exact path I took to make everything work properly.
Install a Nerd Font
The screenshot above shows a few prompt themes. There are many themes, and you can also customize them or create your own. As you can see, most themes include glyphs (special icons/symbols). If the font used by your terminal doesn’t contain those glyphs, you’ll see replacement characters (for example, a square ▯ or a question mark �).
To render glyphs correctly, install a Nerd Font from the project website: https://www.nerdfonts.com/.
Nerd Fonts patches developer-targeted fonts with a large number of additional glyphs (icons), including popular icon fonts like Font Awesome, Devicons, Octicons, and others.
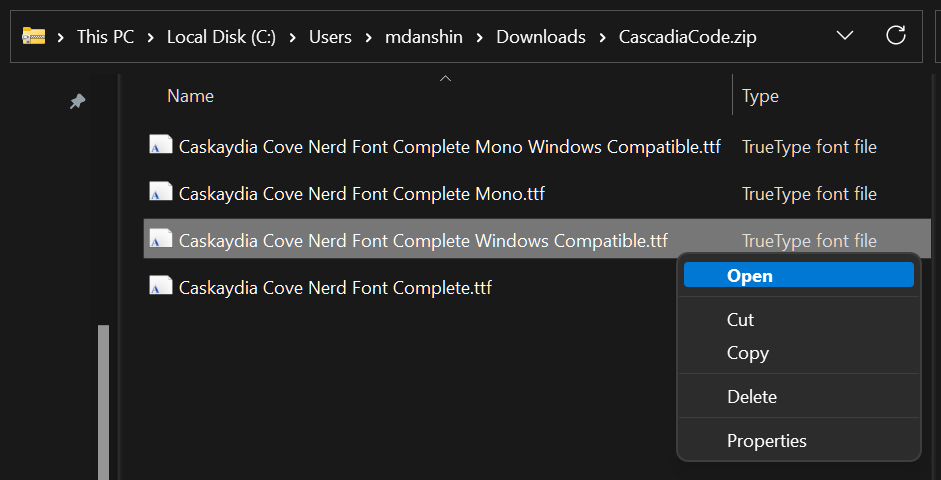
After browsing a few fonts, I chose Caskaydia Cove Nerd Font.
All fonts: https://www.nerdfonts.com/font-downloads
Download the font, open the archive, select the font files you want, and open one.
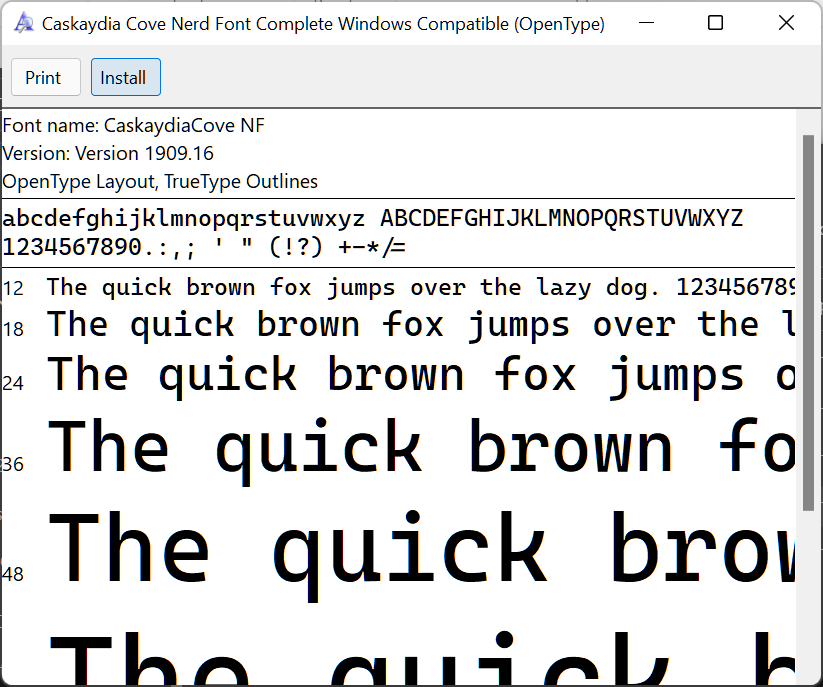
In the window that opens, click Install.
Now the font is installed. Next step: install Oh My Posh.
Install and configure Oh My Posh for PowerShell
As described in the official documentation, Oh My Posh is a customizable prompt engine for any shell that allows prompt customization via a function or variable. To use it in PowerShell, you need to install and import the corresponding module.
This may fail if your PowerShell ExecutionPolicy is set to Restricted (or another value that blocks running scripts). Check it with Get-ExecutionPolicy. To change it, start PowerShell as Administrator and run the command below, then confirm with Y + Enter:
Set-ExecutionPolicy RemoteSigned
This will allow you to install the module.
IMPORTANT: After changing ExecutionPolicy, close the elevated PowerShell window and open a new one as a regular user.
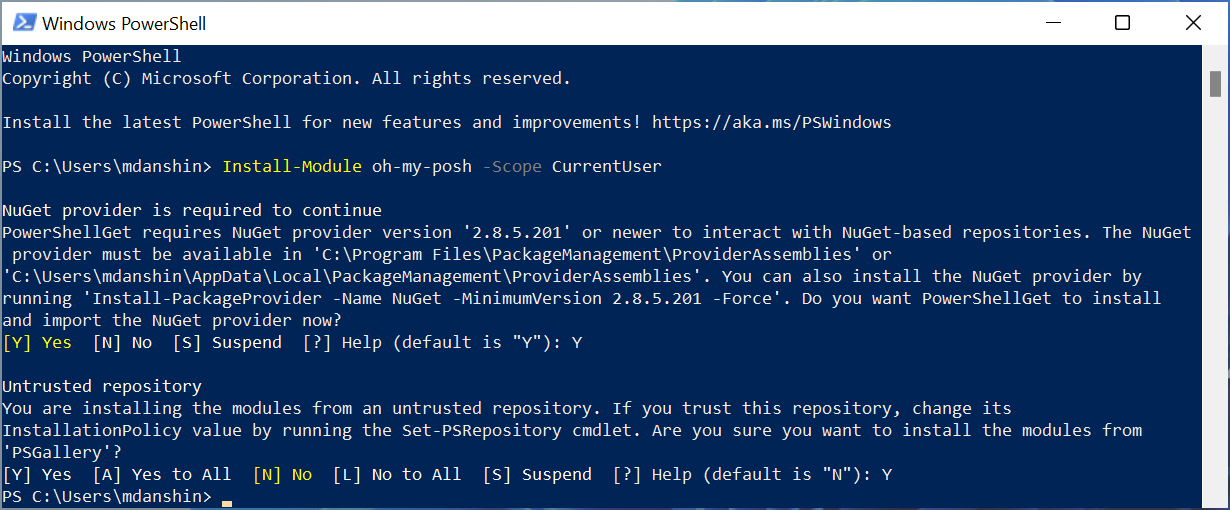
Install Oh My Posh:
Install-Module oh-my-posh -Scope CurrentUser
If NuGet is not installed, PowerShell will ask to install it — type Y and press Enter.
Then PowerShell will warn that you’re installing from an untrusted repository (PSGallery). This is normal: repositories are considered untrusted by default. Continue by typing Y and pressing Enter.
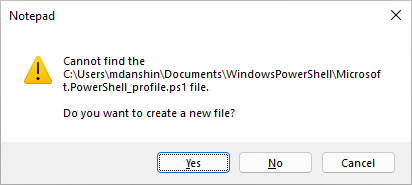
Now update your PowerShell profile by editing Microsoft.PowerShell_profile.ps1. The simplest way to open it is:
notepad $PROFILE
If the file doesn’t exist, Windows will offer to create it — click Yes.
Add the following snippet at the end of the file. Instead of jandedobbeleer you can use any other theme. I chose this one.
Import-Module oh-my-posh
Set-PoshPrompt -Theme jandedobbeleer
Save and close the file. From now on, every new PowerShell session will import Oh My Posh and apply the selected theme.
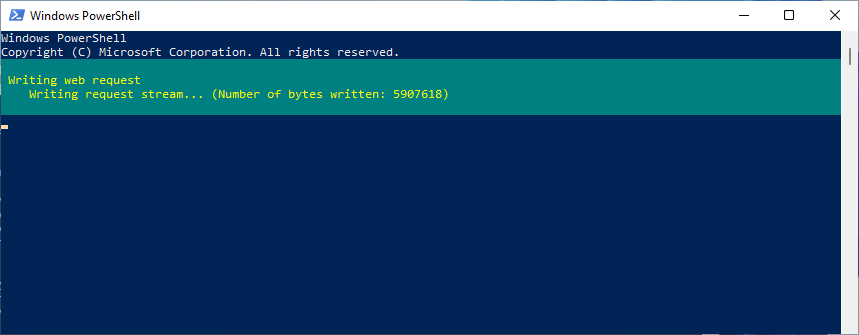
Open a new PowerShell window. On the first run you may see the module import process — it happens once. Next runs should be normal.
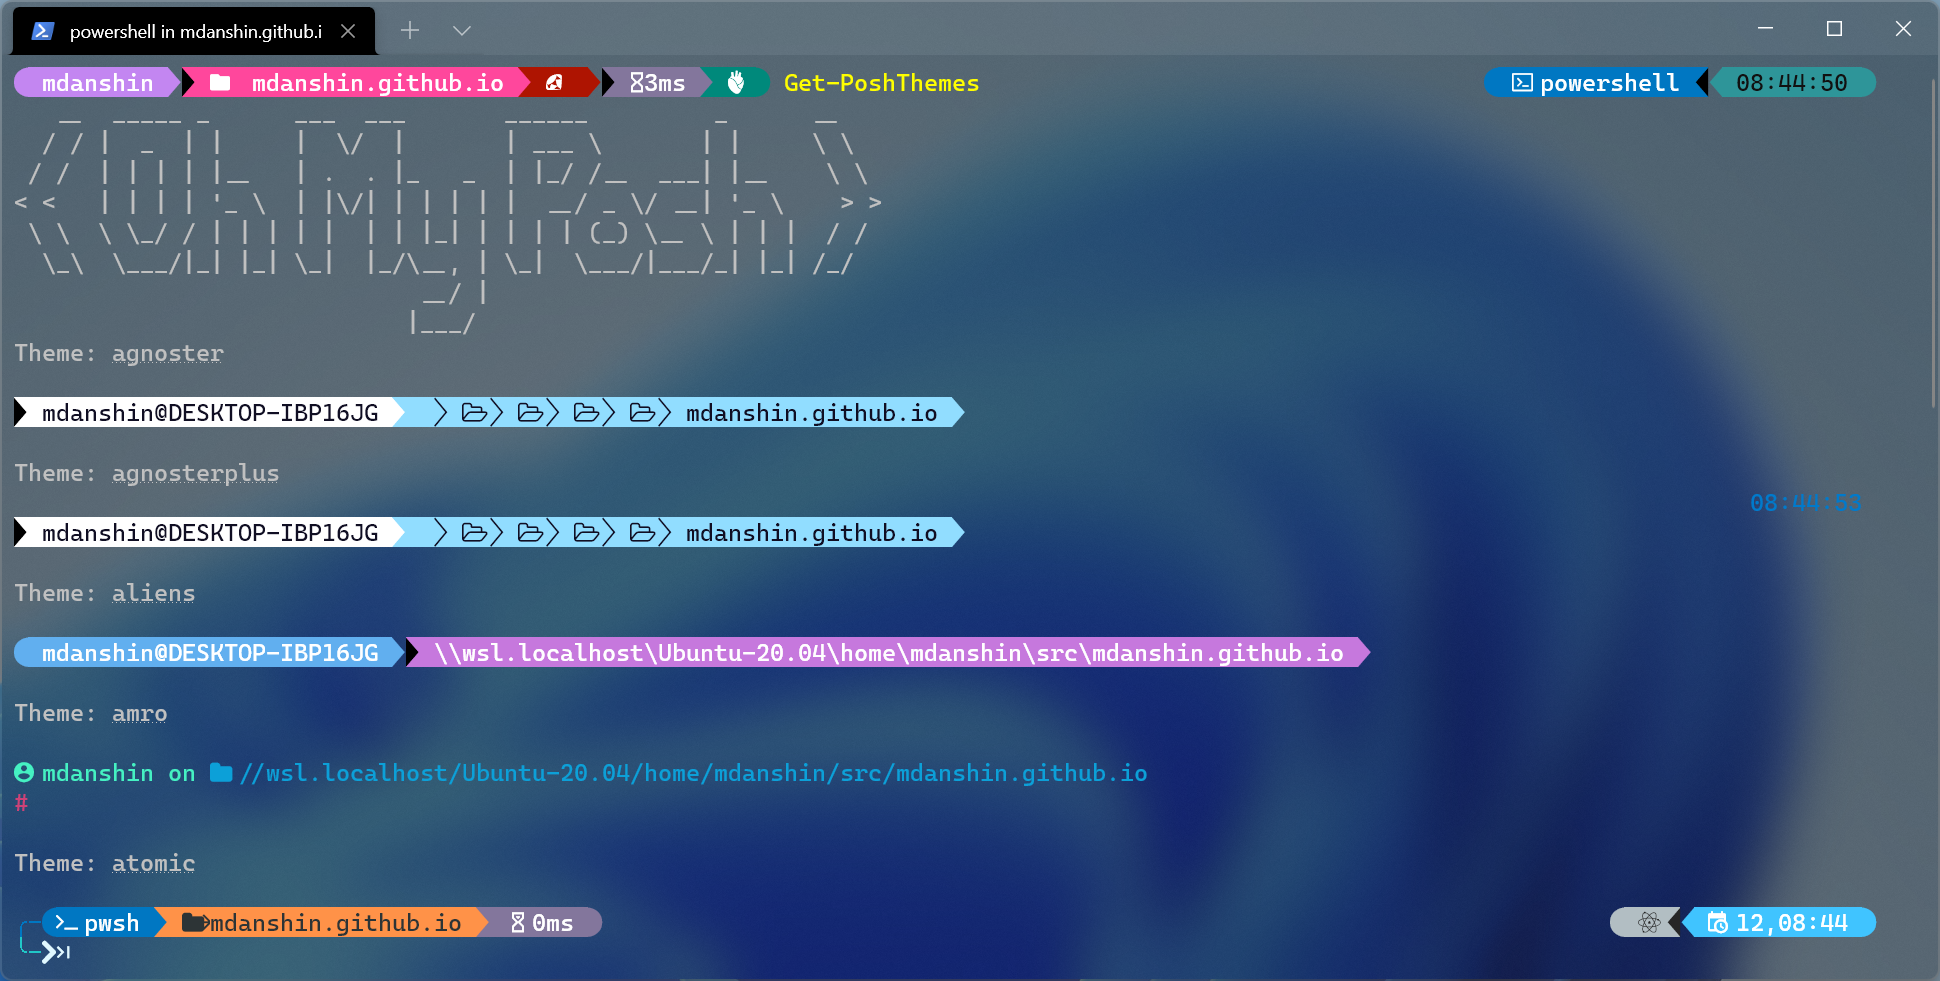
After startup you’ll see the new prompt, but not all symbols may render correctly — because the PowerShell console still uses a font without the required glyphs.
Go to PowerShell terminal settings and choose the Nerd Font you installed earlier (or install it now if you skipped the font step).
Once you set the right font, the prompt will render properly:
Install and configure Oh My Posh for WSL
If you’re on Windows 10 2004+ (Build 19041+) or Windows 11 and WSL is not installed, you can install it by running
wsl --installin an elevated PowerShell window, then rebooting. After reboot, installation continues. A dedicated WSL setup post is coming soon.
To install Oh My Posh in Linux (WSL), we’ll use Homebrew. Start WSL and install Homebrew by running:
/bin/bash -c "$(curl -fsSL https://raw.githubusercontent.com/Homebrew/install/HEAD/install.sh)"
After Homebrew is installed, run a few commands to add it to your PATH and to your shell profile:
test -d ~/.linuxbrew && eval "$(~/.linuxbrew/bin/brew shellenv)"
test -d /home/linuxbrew/.linuxbrew && eval "$(/home/linuxbrew/.linuxbrew/bin/brew shellenv)"
test -r ~/.bash_profile && echo "eval \"\$($(brew --prefix)/bin/brew shellenv)\"" >> ~/.bash_profile
echo "eval \"\$($(brew --prefix)/bin/brew shellenv)\"" >> ~/.profile
Now install Oh My Posh:
brew tap jandedobbeleer/oh-my-posh
brew install oh-my-posh
Install unzip (required to unpack the themes archive). You can skip this if you download a theme manually and place the theme file in your home directory.
sudo apt install unzip
Download and unpack themes:
mkdir -p $(brew --prefix)/oh-my-posh/themes
wget https://github.com/JanDeDobbeleer/oh-my-posh/releases/latest/download/themes.zip -O $(brew --prefix)/oh-my-posh/themes/themes.zip
unzip $(brew --prefix)/oh-my-posh/themes/themes.zip -d $(brew --prefix)/oh-my-posh/themes
chmod u+rw $(brew --prefix)/oh-my-posh/themes/*.json
rm $(brew --prefix)/oh-my-posh/themes/themes.zip
Copy the theme file to your home directory:
cp $(brew --prefix)/oh-my-posh/themes/jandedobbeleer.omp.json ~/jandedobbeleer.omp.json
Then initialize oh-my-posh:
test -e ~/jandedobbeleer.omp.json && eval "$(oh-my-posh --init --shell bash --config ~/jandedobbeleer.omp.json)"
Your prompt should change. If glyphs look wrong, update the font in your terminal settings as described earlier.
That’s it — Oh My Posh is installed and configured for WSL.
Configure Windows Terminal to display glyphs correctly
After launching Windows Terminal, you need to change the font — otherwise the prompt will render without glyphs.
Open Windows Terminal settings, select the default profile, and under Appearance set the Nerd Font. Click Save and open a new terminal window.
Now the prompt should display glyphs, but there is one issue: when opening a WSL tab, the first prompt line may have gaps. I don’t know why. If you press Enter, the next line usually renders correctly.
My workaround was to add a screen clear command to .profile so it runs at session start:
echo "clear" >> ~/.profile
After reopening the terminal, everything should look correct:
This finishes the Windows Terminal part. Another post about making Windows Terminal look nicer is coming soon.
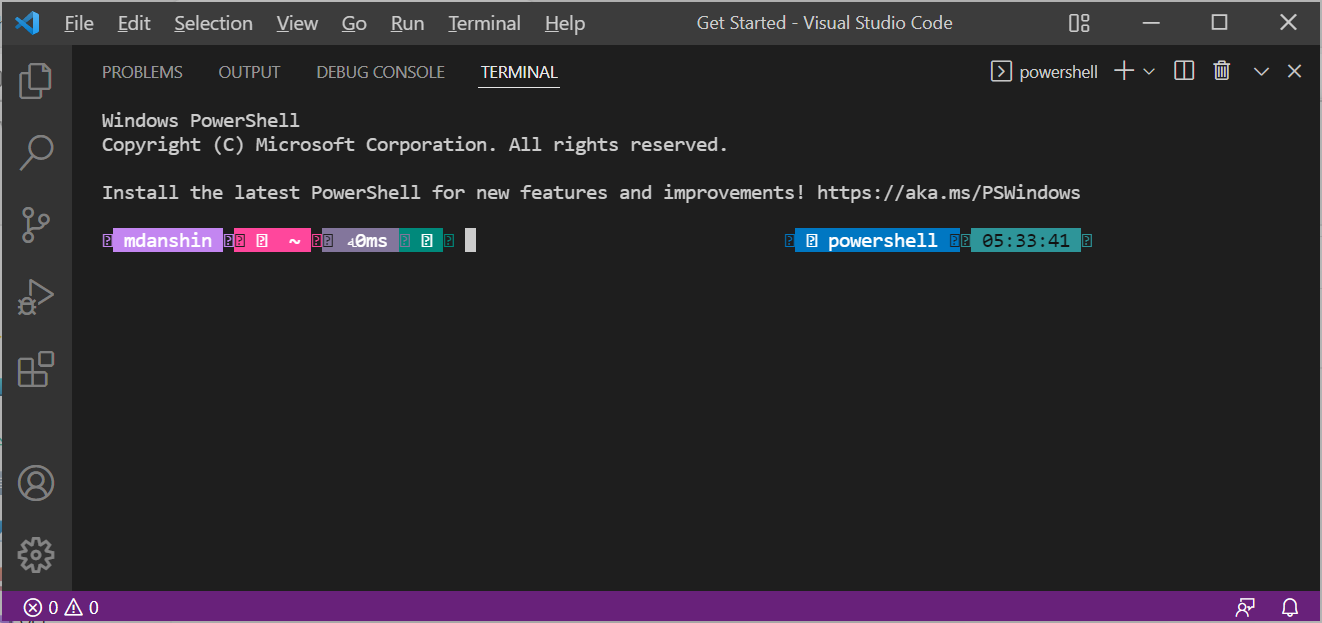
Configure VS Code to display glyphs correctly
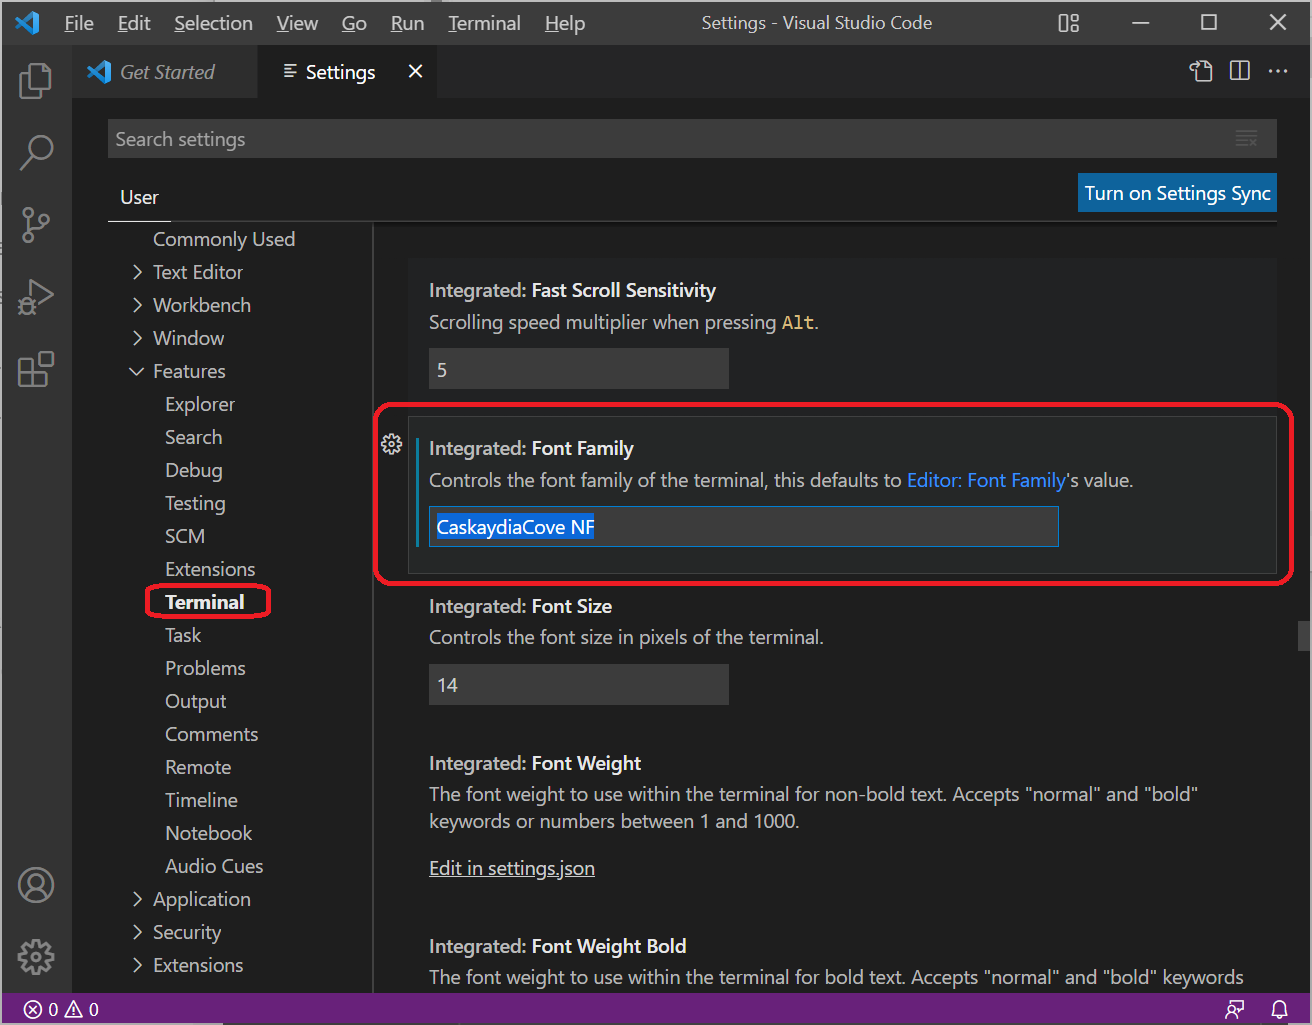
If you open VS Code and open the integrated Terminal, you’ll likely see that glyphs are rendered incorrectly too. It’s a font setting issue.
Open settings, go to Terminal, find Integrated: Font Family, and enter your font name. In my case it is CaskaydiaCove NF. The setting key is terminal.integrated.fontFamily.
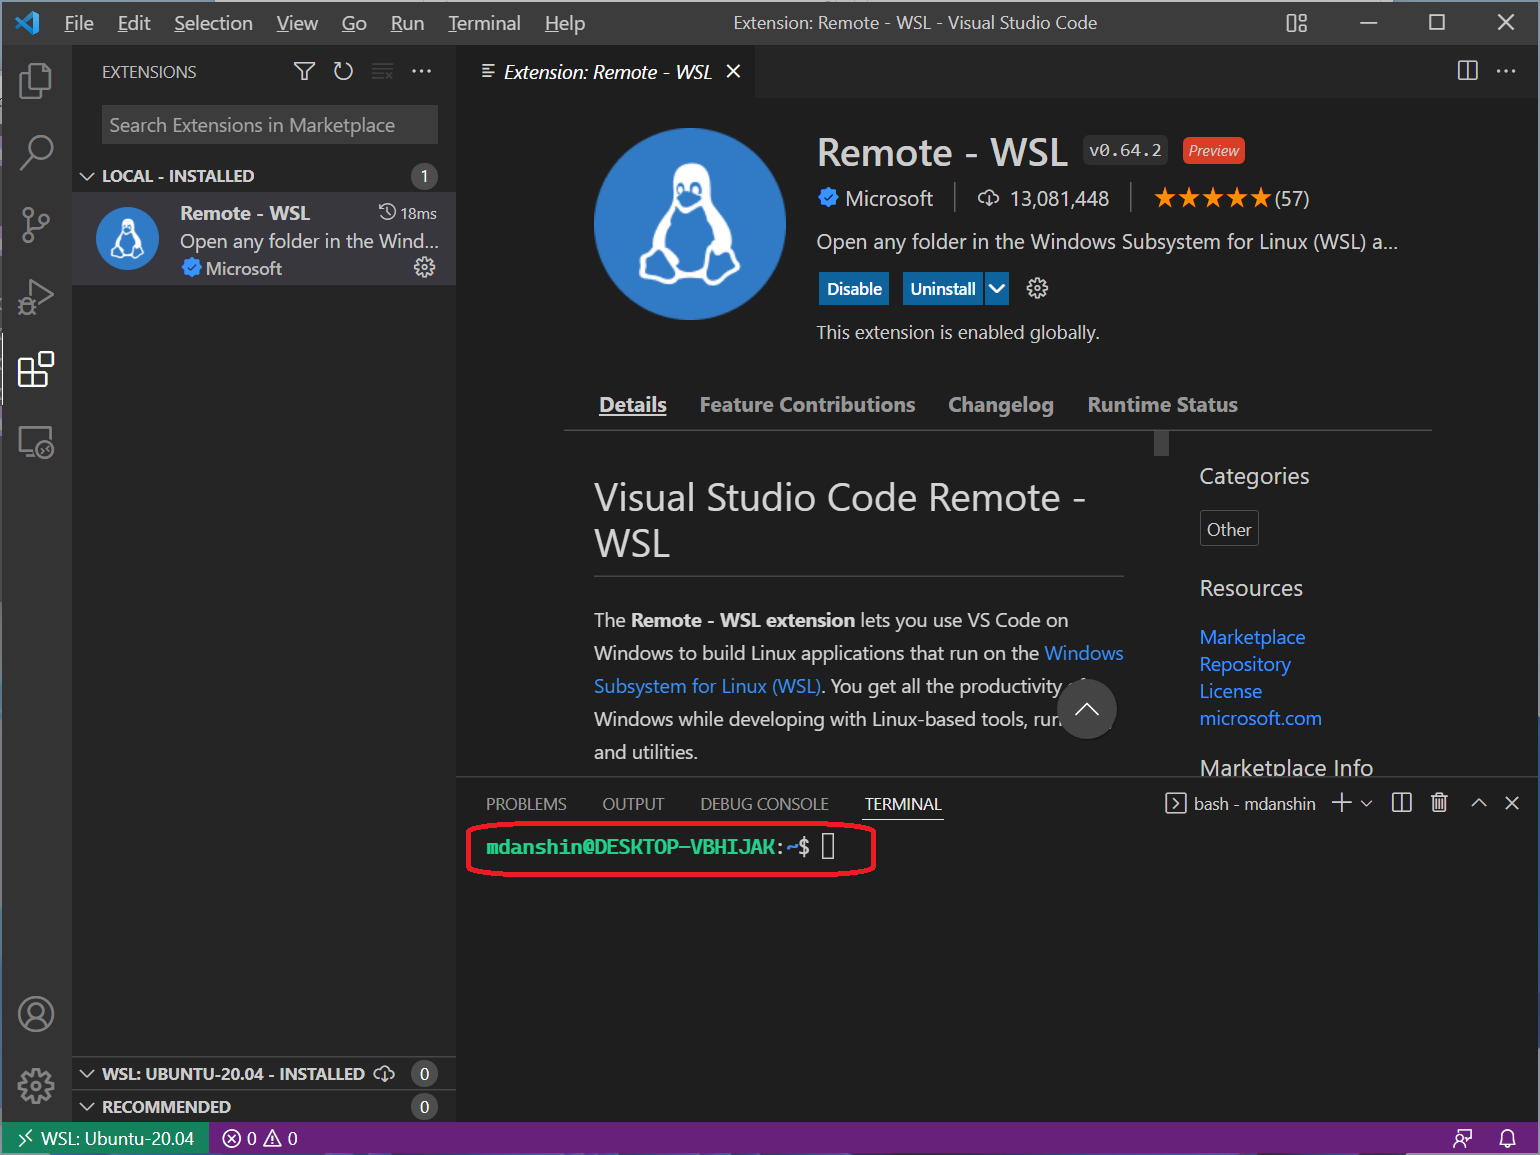
If you use the Remote - WSL extension in VS Code, one more tip may help. When you open a new WSL session in VS Code, you might notice nothing changed. VS Code, when launching bash in WSL, doesn’t read .profile where we added our config.
You can fix it manually by running:
bash -l
The
-lparameter makesbashbehave as a login shell. Login shells read initialization files like.profile.
But to avoid doing it every time, update VS Code settings.
Add the following (merge with your existing settings if needed):
"terminal.integrated.defaultProfile.linux": "bash",
    "terminal.integrated.profiles.linux": {
        "bash": {
            "path": "bash",
            "args": [
                "-l"
            ]
        }
    }
Save and restart the WSL terminal session. Now everything should render correctly.
That’s all I wanted to share in this article. Leave your comments and feedback. Take care!